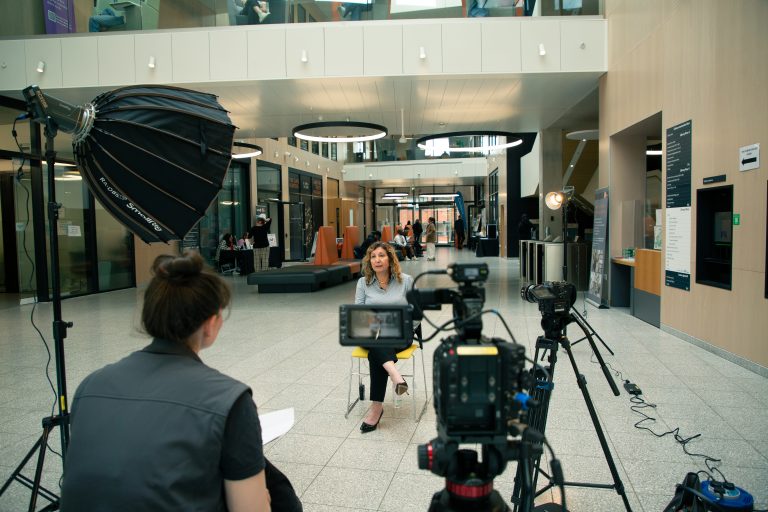
Video lighting is an essential aspect of videography that can significantly impact the overall quality of your video recordings. Proper lighting not only ensures that your subjects are well-illuminated and visible but also helps create the desired mood, atmosphere, and professional look.
Importance of Video Lighting
Good lighting is crucial for video recording as it affects various elements of your video, such as exposure, colour accuracy, and the overall mood. Here are some key reasons why having a good video lighting setup is important:
-
- Exposure and Visibility: Good lighting ensures that your subjects are well-lit and clearly visible to your audience. It prevents underexposure (darkness) or overexposure (brightness) that can distort details or make the footage unusable.
- Colour Accuracy: Correct lighting helps maintain accurate colours and prevents colour casts that can occur when lighting conditions are not optimal. Consistent and accurate colours enhance the visual appeal and professionalism of your videos.
- Mood and Atmosphere: Lighting plays a crucial role in setting the mood and atmosphere of your video. Different lighting techniques can evoke various emotions and enhance storytelling. It can create a sense of drama, intimacy, or excitement, depending on your desired outcome.
- Depth and Dimension: Well-executed lighting techniques can add depth and dimension to your video. By using techniques like three-point lighting, you can create visual interest and separate your subjects from the background, giving your video a more polished look.
- Professionalism and Aesthetics: High-quality lighting can significantly elevate the overall production value of your videos. Well-lit scenes appear more professional, engaging, and visually appealing, leaving a positive impression on your audience.
Factors to Consider for Video Lighting Setup
To achieve the best lighting for your video shoots, it’s important to consider the following factors:
Natural vs. Artificial Lighting
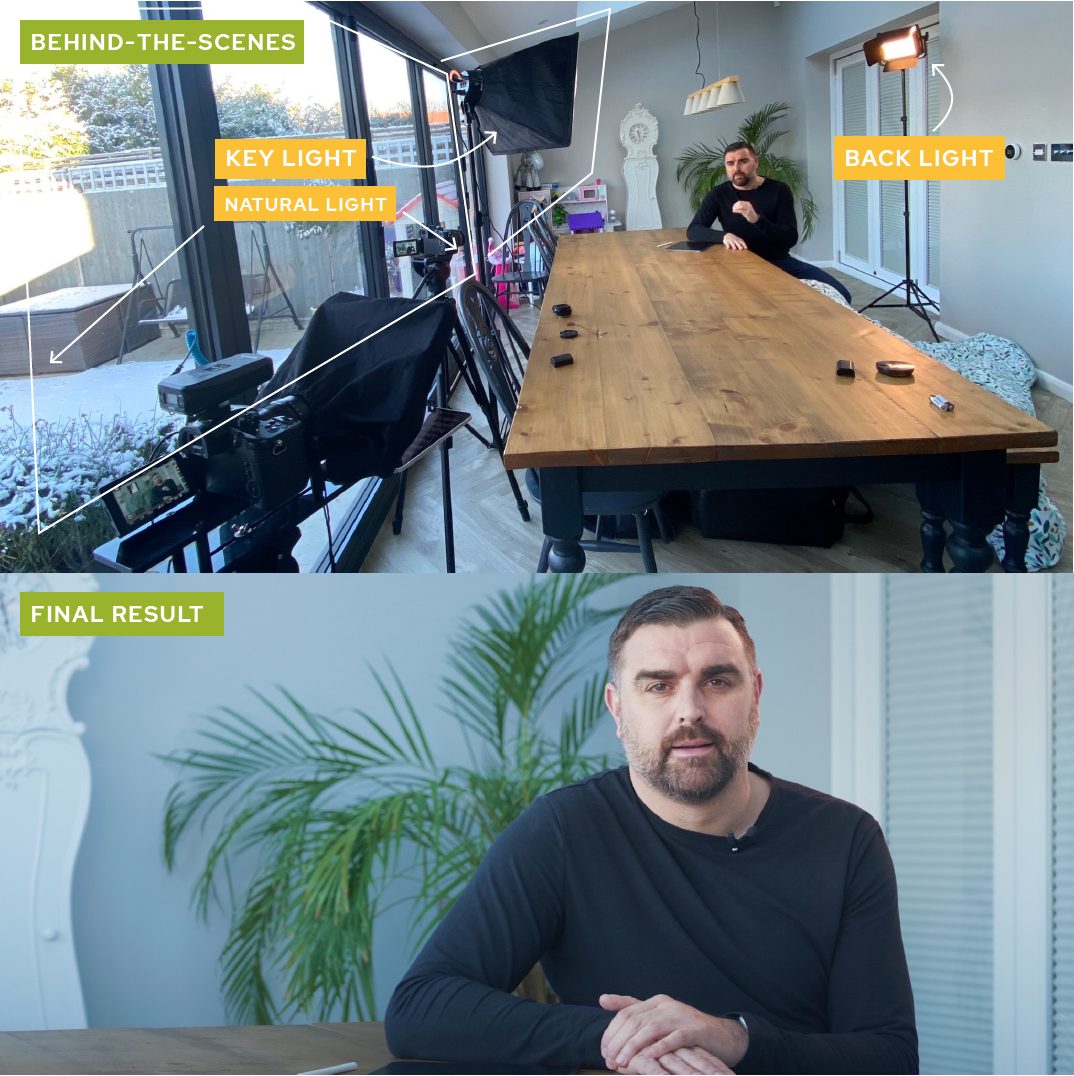
Decide whether you want to work with natural light, artificial light, or a combination of both. Natural light can provide a soft, flattering look but is uncontrollable and subject to changes in weather and time of day. Artificial lighting – such as studio lights – gives you more control, but requires additional equipment and setup.
Lighting Equipment
Choose the appropriate lighting equipment based on your specific needs. Some common types of lighting equipment include:
- Key Light: The primary light source that illuminates the subject. It provides the main exposure and sets the overall tone for the scene.
- Fill Light: Used to soften shadows created by the key light. It reduces the contrast and adds more detail to the subject.
- Backlight: Positioned behind the subject to separate it from the background, adding depth and highlighting the edges.
- Reflectors: These bounce and diffuse light to fill in shadows or redirect light onto the subject, providing a more natural and even illumination.
- Light Stands and Mounting Accessories: Essential for positioning and adjusting lights to achieve the desired lighting effects.
Lighting Techniques
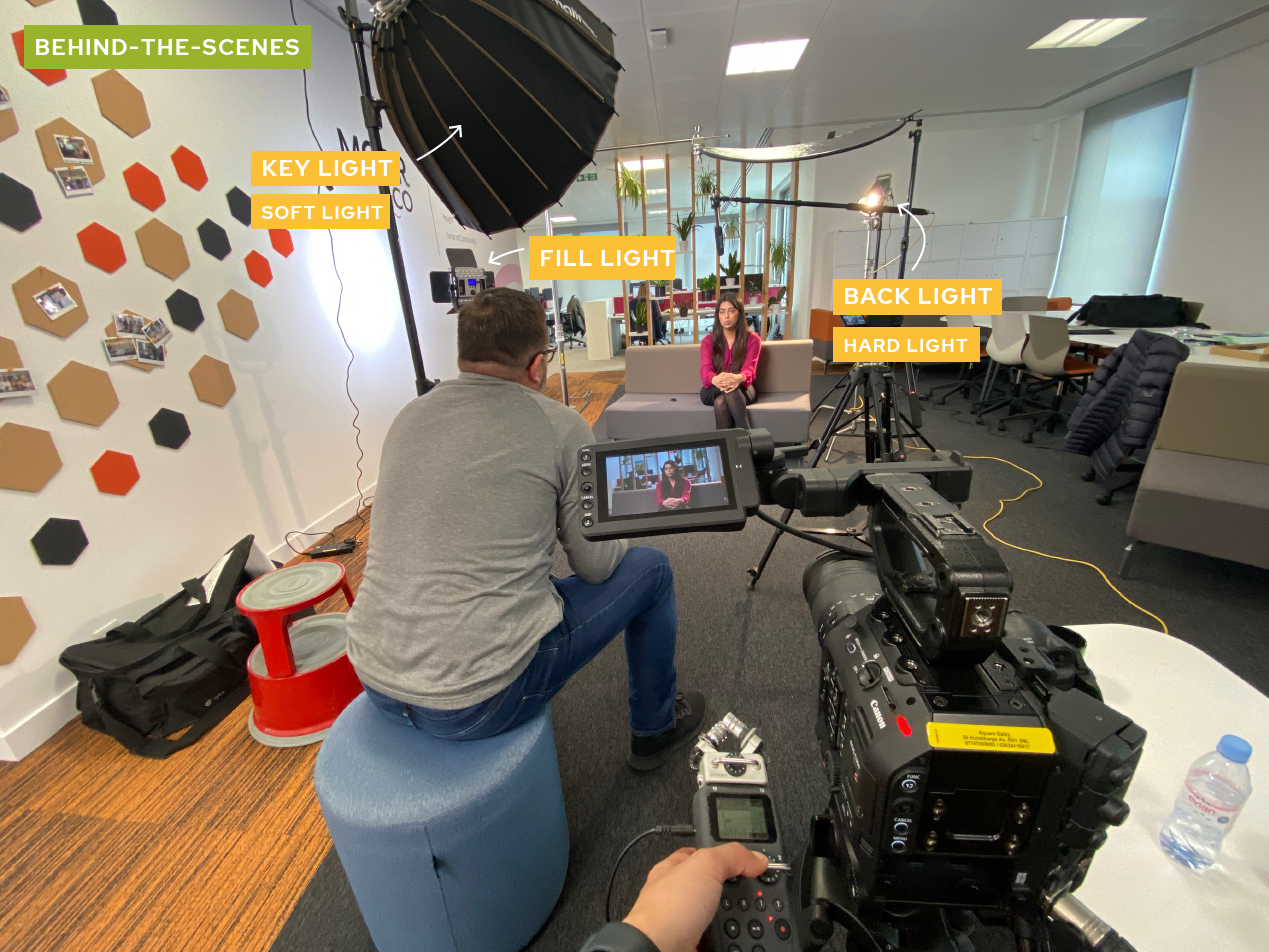
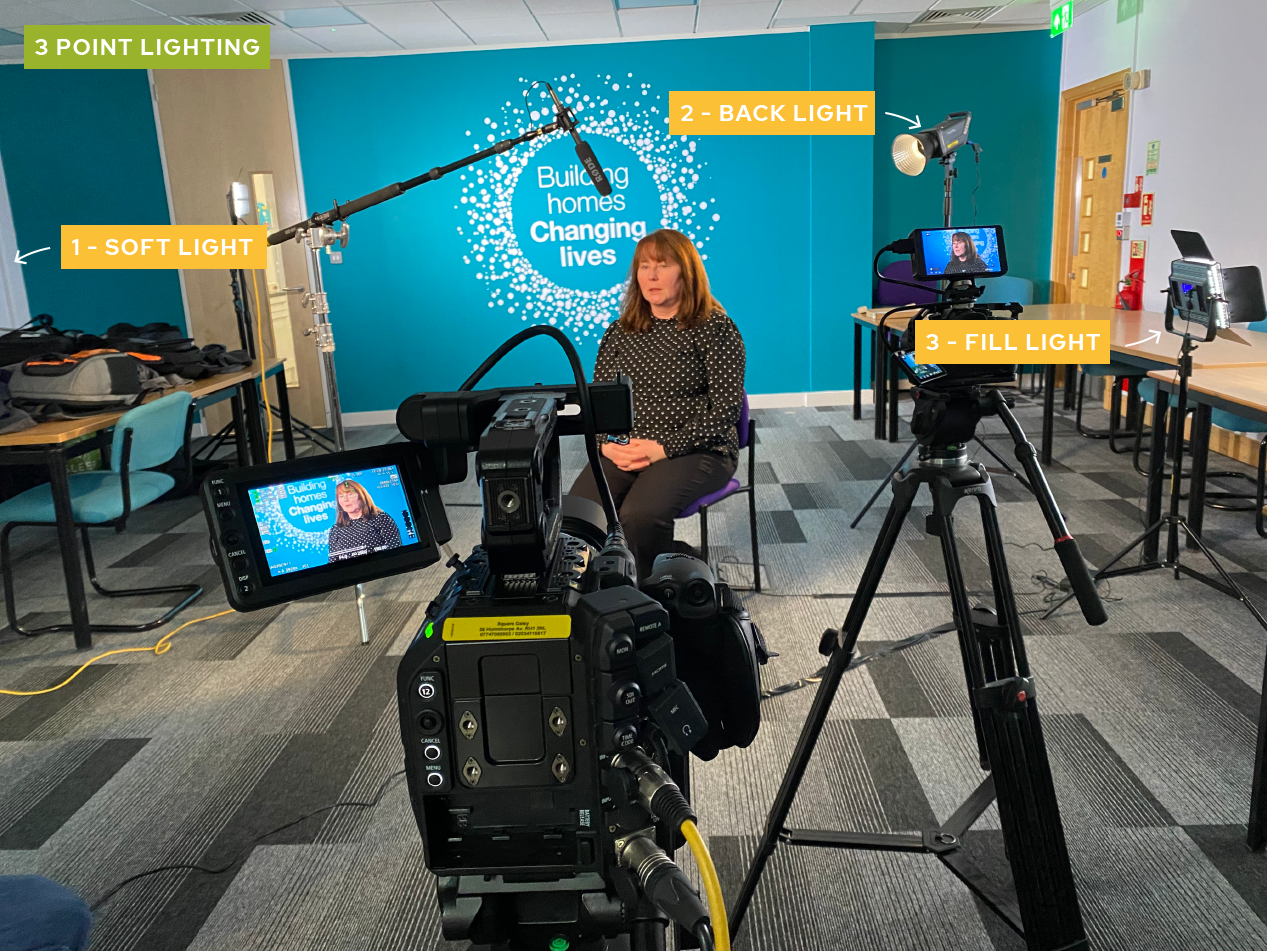
Experiment with different lighting techniques to achieve the desired look and feel for your video, the most common one is three point lighting. This classic technique uses a key light, fill and back light, it provides balanced and flattering illumination for the subject. This technique is versatile and can be adjusted to suit different interview scenarios.
Soft light vs Hard light
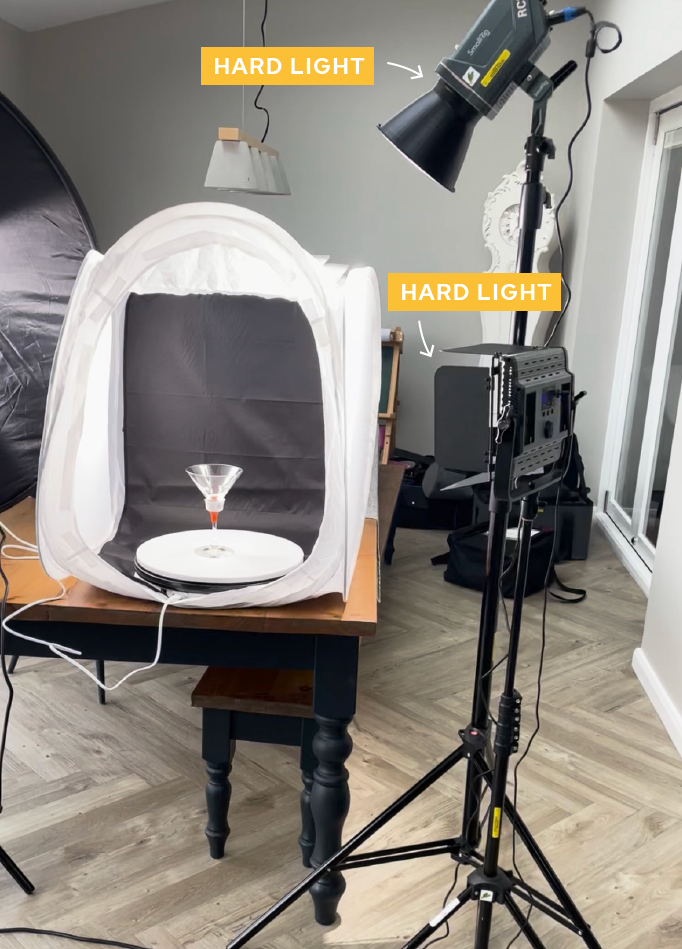
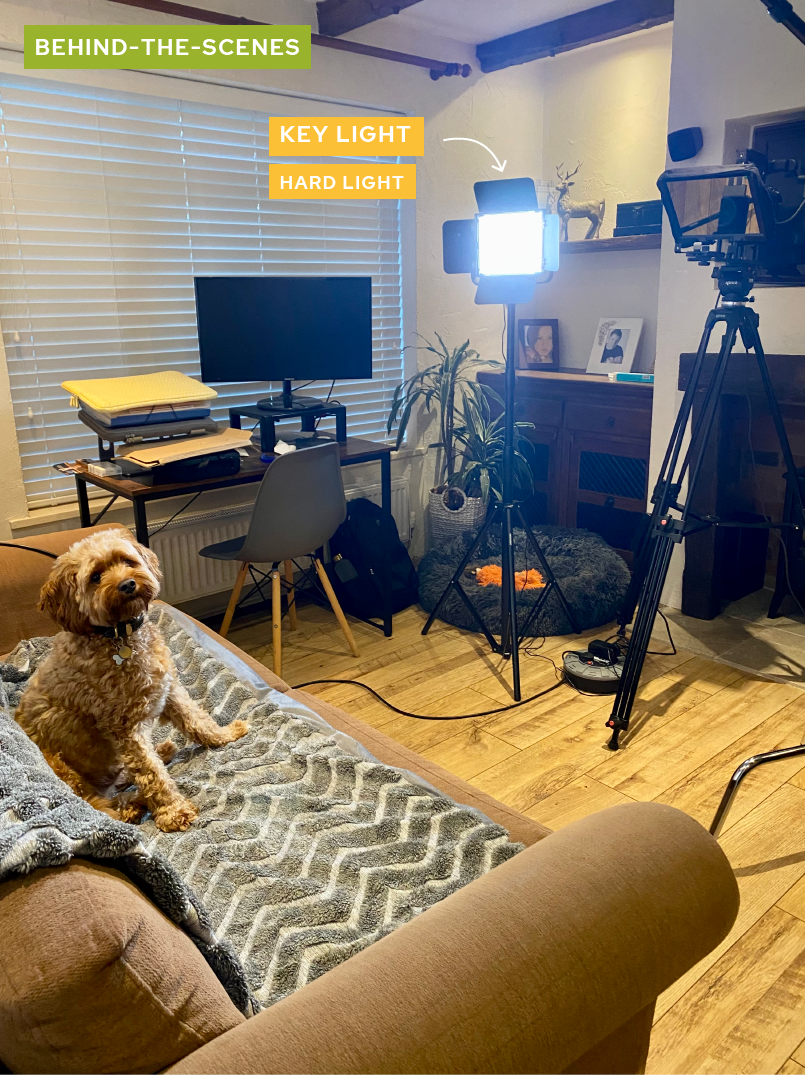
Soft light and hard light are two different types of lighting that produce distinct visual effects in videography. Soft light is diffused and creates gentle, smooth shadows with gradual transitions between light and dark areas. It is often achieved by using large light sources or modifiers such as softboxes or diffusers. Soft light is flattering and reduces imperfections, making it ideal for interviews. On the other hand, hard light is direct and creates sharp, well-defined shadows with abrupt transitions between light and dark areas. It is achieved by using smaller light sources or unmodified lights, like LED lights/ panels. Hard light adds contrast to the scene, making it suitable for creating a more dynamic visual impact. Understanding the differences between soft light and hard light allows videographers to choose the most appropriate lighting setup to achieve their desired aesthetic and convey the intended mood in their videos.
Lighting a green screen
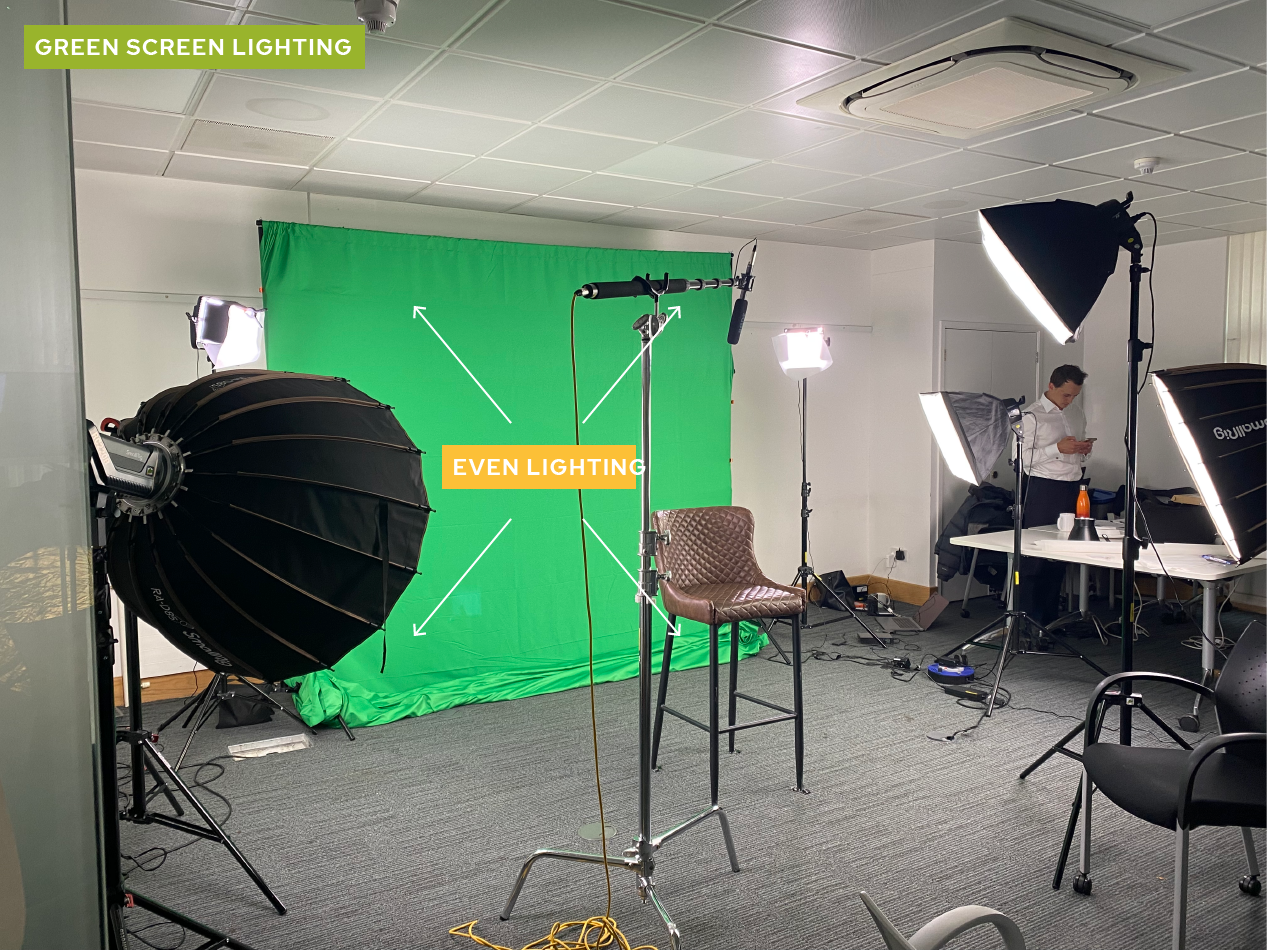
Lighting a green screen effectively is crucial for achieving a seamless and believable chroma key effect in videography. There are several key elements to consider when lighting a green screen:
- Even Lighting: Ensure the green screen is evenly lit without any hotspots or shadows. Use multiple light sources or light panels to achieve consistent illumination across the entire screen surface. This helps to avoid inconsistencies in colour and brightness that could affect the quality of the chroma key.
- Distance from the Subject: Position the subject at an optimal distance from the green screen to avoid any spill or colour contamination. Keeping a sufficient distance between the subject and the green screen helps prevent unwanted reflections or shadows on the screen, which can make the chroma keying process more challenging.
- Separation from the Background: Use backlighting or rim lighting on the subject to create separation between the subject and the green screen. This helps to enhance the edges of the subject, making it easier to extract during the chroma key process and ensuring a clean and accurate keying result.
- Avoiding Spill: Take precautions to minimise spill, which occurs when green light spills onto the subject. Spill can lead to colour contamination and make the keying process more difficult. Position the lights and use flags or barn doors to control the direction and intensity of the light, preventing any spill onto the subject.
Lighting in an outdoor environment
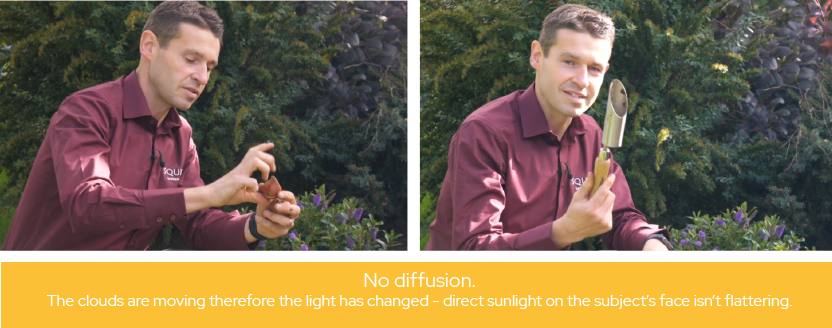
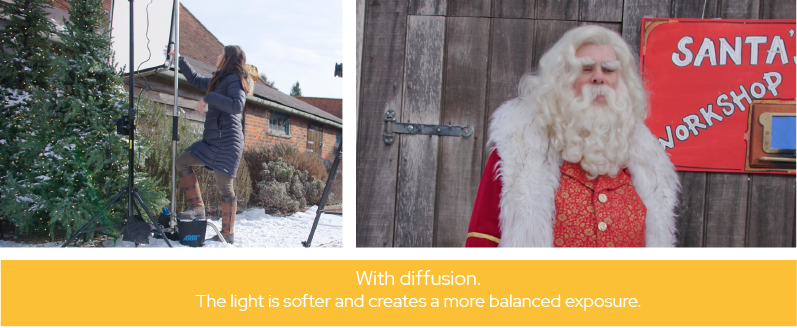
It’s important to be mindful of the natural lighting conditions and plan your shoot accordingly. If shooting during the day, consider the position of the sun and how it affects your subject. To diffuse harsh sunlight, use diffusers or reflectors to soften the light or create a more balanced exposure. Using neutral density filters on the camera lens can help control excessive brightness.
Conclusion
Video lighting plays a critical role in videography, impacting the overall quality, mood, and professionalism of your videos. By considering factors such as natural vs. artificial lighting, lighting equipment, colour temperature, lighting techniques, and the shooting environment, you can set up the perfect lighting for your video shoots. Remember to experiment, practice, and adjust your lighting setup to achieve the desired visual effects and create compelling videos that engage and captivate your audience.
Hiring a video production company like Square Daisy can significantly enhance the professional look of your videos. We have a wide range of lighting equipment, including high-quality studio lights, diffusers, reflectors and gels. We can select the most suitable equipment based on specific requirements of your video, whether it’s a well-lit interview, a dramatic scene or an outdoor shoot. We have experience in creating a well- balanced lighting setup that compliments the subject matter and achieves the desired aesthetic. Square Daisy can help creating a visually captivating and consistent look that aligns with your goals and enhances the overall quality of the final product.

